MD-9600
The TYT MD-9600 is the latest Dual Band mobile to come on the ham radio scene. It can be used on the DMR Tier II repeater network as well as local FM repeaters.
In the Box
Included with the radio are the:
– Mounting Bracket
– 12v Power Cord
– 64 page User Guide – English
– Driver and Software CD
– Programming Cable (optional)
General Description
– VHF / UHF Dual Band
– DMR / FM
– 45-50w transmit
– 10,000 contacts
– 3,000 channels
– 250 zones
– 64 channels per zone
Overview Summary – Operation
The MD-9600 was specifically designed with the amateur radio operator in mind. I’ve been putting mine through its paces for just over a week with excellent results. There’s plenty of power for a mobile installation with a heavy duty heat sink and fan to keep the radio cool. If you are currently using a TYT MD-2017 handheld, great news. You can use your existing code plug to get the 9600 on the air. So, let’s take a look at the radio itself.
Transmitter
The frequency range of the 9600 is 136-174 VHF and 400-480 MHz UHF. The power levels are consistent across the entire specified range.
I’ve been using the 9600 extensively for the past week into the local repeaters and the audio reports have been excellent. Initially, the radio was specified as a dual power radio (Hi/Lo), but now has four selectable power settings. I put it into a calibrated Bird Termaline wattmeter to see how close it would come to the rated 45-50w and it came pretty close.
** Packet Loss on VHF DMR
Recent testing has unveiled a packet loss issue that occurred when using low power on VHF DMR.
These Loss Rates were recorded at the following power levels:
Low= 24% Mid1= 18% Mid2= 5% High= 0.0 packet loss.
The packet loss on low power made the audio unreadable. On High power, the issue did not occur and the audio was good. TYT is aware of the issue.
Performance on Analog and UHF DMR appears unaffected.ReceiverThe receiver sensitivity is very good on both digital and analog with plenty of clear, loud, and undistorted audio. The receiver has a Channel Free tone option that signals when an incoming signal has dropped.
The 9600 has true narrowband receive capabilities, so if you accidentally select NB, you will know instantly when a wide band signal is detected. When programming Analog channels, keep in mind that the code plug will default to narrowband.
Audio
The 5w receive audio amplifier provides plenty of power to drive the internal speaker, almost to the point of overdrive. The audio is a bit tinny, but when I plugged in my 4″ mobile speaker, the audio quality was very good. On the transmit side, the reports of audio strength and quality were excellent.
When using analog, there is a slight pop that can be heard at the end of a transmission. Not loud, but noticeable.
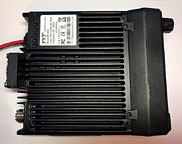
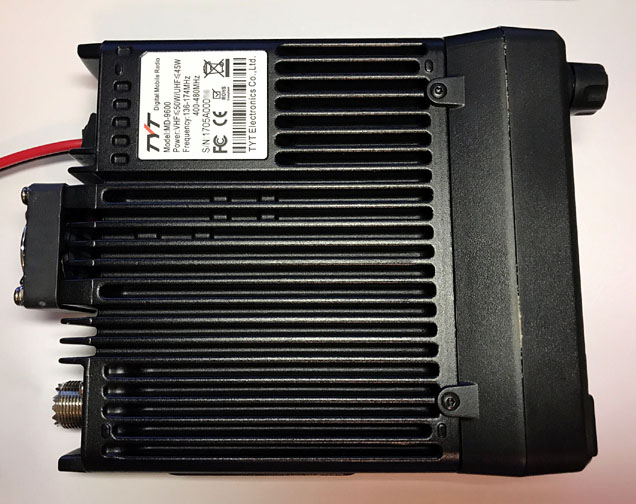
Enclosure
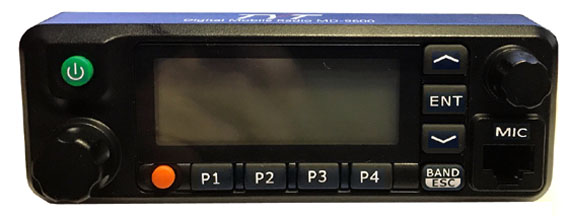
The MD-9600 case weighs in at 2lb 4oz. (1.02 kg), with the greater majority of the weight attributed to the heat sink. There’s a 1.5 x1.5″ fan on the back that kicks on immediately when the transmitter is keyed keeping the radio cool from the very start. The control head is not removable, so the angle of the installation may be a consideration.
click to enlarge |
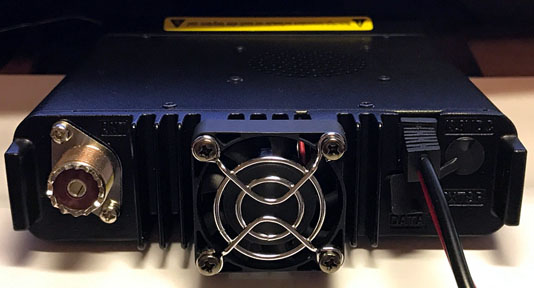
The antenna connector on the rear of the chassis is an SO-239. Along with the 1.5″ fan is an input jack for an external speaker and a mini-USB connector for the programming cable.

click to enlarge |
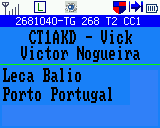
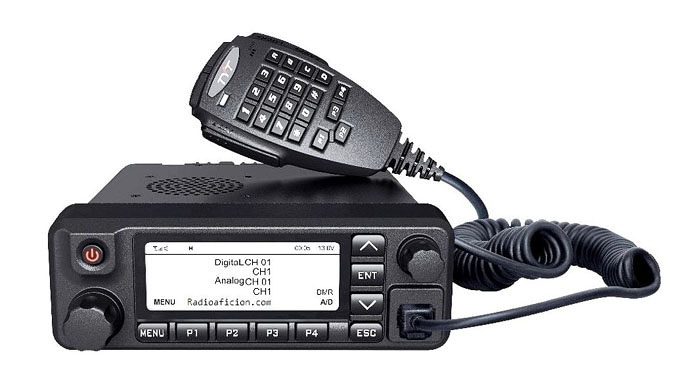
Display
The radio has a two color display. The main background is a sky blue with dark blue icons. The screen size is 7/8 x 2 1/2″ and has a software adjustable backlight timer (5, 10, 15 seconds or always on). However this does not apply to the microphone. The keypad remains lit even when the power is turned off. The factory is aware of this so a fix should be forthcoming.

click to enlarge |
Note: Some ads show the MD-9600 with a High Resolution LCD. These images were more than likely an artist’s perception of the future. The actual LCD on my radio is shown above.
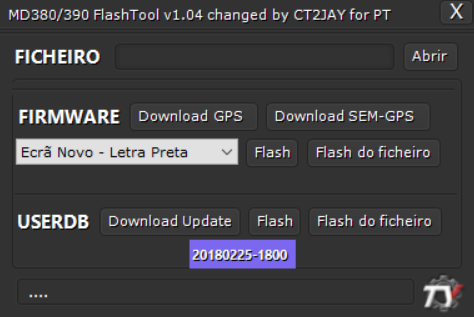
Firmware
The MD-9600 firmware is fully upgradable. Coincidently, the day mine arrived, there was a new update available which allows me to use my existing code plug from either my MD-380 or my MD-2017 to create an initial CP. That saved quite a bit of startup time for me as my 2017 CP is quite extensive, but everything transferred perfectly on the first try. Because of the internal differences between the two radios, the MD-9600 CP is not backward compatible to the 380 or 2017.
SW = V01.18
FW = D003.029
Programming
If you are new to the world of DMR, the Code Plug (CP) will be the first hurdle you will need to overcome. Programming a digital radio is quite a bit different than an FM transceiver, so I recommend that you find someone in your area that can assist by not only supplying an initial template, but more importantly explain how it is structured.
As I mentioned above, a working CP from either an MD-380 or MD-2017 is a great starting point. Programming can also be done via the keypad.
Zones
Each zone can contain up to 128 channels, 64 channels for the upper display and 64 for the lower. That breaks through the 16 channel limit found in many transceivers. Any combination of DMR or analog channels can be entered in a zone.
Software
Even though the radio can be programmed via the keypad when on the road, the software is definitely easier for large additions. The factory software is fairly straight forward as far as DMR is concerned. A little intimidating at first, but call it a basic learning experience.
The latest software can be found at the TYT Download page.
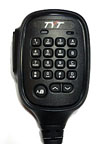
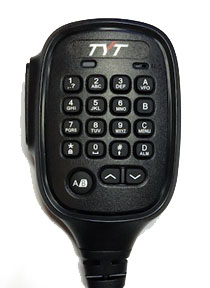
Microphone
The microphone has a traditional 16 button layout with Up/Down arrows and A/B display switching button and a transmit indicator LED. The connector is an RJ-45. This type is used by several other vendors, however the wiring is unique to this radio.
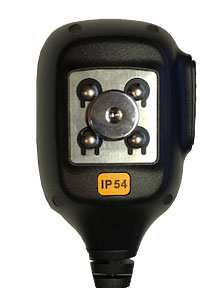
The back of the microphone shows ‘IP54’, indicating the radio is protected against dust and splash water.
click to enlarge |
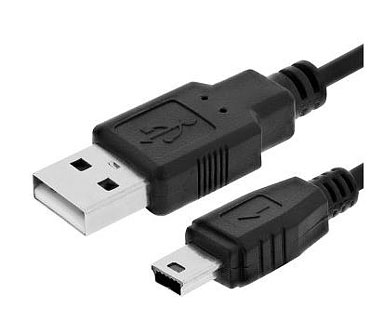
Programming Cable
Here’s where you get a bit of a break. The programming cable for the MD-9600 is a standard straight through USB to mini-USB. The UART chip is in the radio, so no special drivers are necessary. When the cable was plugged into my PC, the proper driver loaded automatically.
Conclusion
For TYT’s first attempt at a dual band DMR mobile transceiver, they did well.
The obvious pros are the following:
– True Tier II DMR
– Dual Band VHF/UHF operation
– Plenty of power and cooling
– Latest FW allows using MD-380/2017 CP as a starter
– Programmable from the keypad
However:
– The VHF low power packet loss issue described above
– Microphone keypad remains lit even when the power is turned off
– LCD Contrast could to be a bit sharper
The MD-9600 is solidly built, and there are plenty options geared more for ham radio operation. It performs well and makes a nice addition to the ham shack or mobile.


